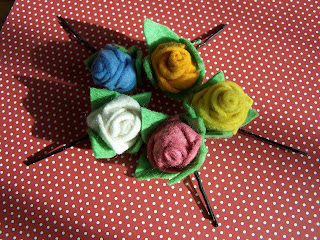
My sister-in-law, made these gorgeous hairpins last night as I was sewing yet another Easter egg garland... Maybe her flower girls will be wearing white felt roses in their hair.
Friday, March 30, 2012
Wednesday, March 28, 2012
PORCUPINE HAIRPIN
Porcupine hair clip
This hair clip was my first hair accessory comission! :) It was requested by my super-cute goddaughter... well one of my super-cute goddaughters to be exact. She wanted a porcupine hairclip after she was the porcupine bib scarf I made for my son (http://thefeverishfeltist.blogspot.com/2012/02/fleece-bandana-bib-scarf-with-felt.html).
I used two felt circles as the base and sewed the porcupine on one of the circles first, attaching first the brown to the body then the body to the circle
 |
| I snapped a pic of her wearing it! :) |
Wednesday, March 21, 2012
EASTER EGG GARLAND
EASTER EGG GARLAND
I made this garland as a gift for a friend out of felt and re-purposed textile. I sewed the ribbon to the back of the eggs close to the top so they would not twirl around. This worked out better than the bird garland where I sewed the ribbon in between the layers of felt.
The textile I used was strips made of some scraps let over from an old dress my friend P and I picked up at a jumble sale. She used the fabric from the dress so sew a really cool dress for her daughter. When she starts her blog I will include a link to the dress (hint hint :))
I made this garland as a gift for a friend out of felt and re-purposed textile. I sewed the ribbon to the back of the eggs close to the top so they would not twirl around. This worked out better than the bird garland where I sewed the ribbon in between the layers of felt.
 |
| For the central egg I cut out one of the baskets that was on the print. |
The textile I used was strips made of some scraps let over from an old dress my friend P and I picked up at a jumble sale. She used the fabric from the dress so sew a really cool dress for her daughter. When she starts her blog I will include a link to the dress (hint hint :))
Wednesday, March 14, 2012
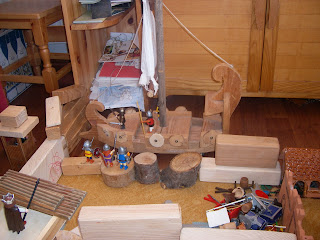
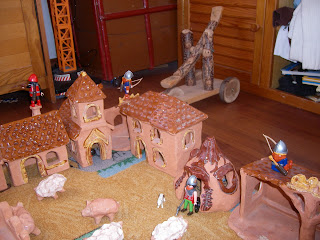
Frici's castle
EDIBLE EYEBALLS
EDIBLE EYEBALLS
Super-sweet and Super-gross these babies could be perfect Monster-party / Halloween/ David Bowie fan club meeting treats!
My son got a Horrible Science book from her godparents
In it there was a recipe that really captured his imagination: edible eyeballs. It seemed a bit complicated at first but once we started making it wasn't that bad.
Recipe:
25g Rice Crispies
75g chocolate
8tbsp powdered sugar (mix it w water to make icing)
M&Ms
clingfilm
Step 1: I melted the chocolate over a bath of boiling water (I actually used the leftover choc from the candied oranges).
 |
| Step2: We mixed Rice Crispies into the chocolate |
 | |||||
| Step 3: We spooned out the goo onto bits of clingfilm and wrapped them like so (see above). The amount spooned out should be more or less that of an eyeball :) |
Step 5: When they have hardened we unwrapped them and place them on baking paper
 | ||||||
| Step 6: We put icing on eyeballs, stuck an M&Ms onto each and put a small dollop of brown store bought icing for the pupils (should have been black) |
 | ||||||
| Here is Daddy indulging in a freshly hardened eyeball with Simon looking on. :)) | P.s. Thank you F and É for all your help! |
Monday, March 5, 2012
PAPER-AIRPLANE MOBILE
One of my sons latest and most enduring obsessions is folding paper airplanes. He loves folding and throwing them about. So for his birthday his grandma bought him an adorable Origami Airplane kit by Djeco (www.djeco.com)
I liked the design of the planes so much, I wanted to use them for decor, so I came up with the idea of making a mobile for the kids' room. So I took some thin ribbon, tape and two wooden sticks and got to work. It is all pretty straight forward, the only tricky bit was finding the spot to attack the ribbon to so the planes would be in balance.
I had a lot of fun photographing the mobile :) Enjoy!
CANDIED ORANGE PEEL
We usually make candied orange peels in the winter, more specifically as Xmas gifts for friends right about the time I make my Spiced Orange jam... However, this year I found such a great recipe for orange jam after we ran out I wanted to make some more to last us until the next orange season... So I made the orange jam and decided not to throw the peel away but rather make candies for Easter! To make things a bit more interesting - and also because I have recently found a huge bar of baking chocolate in the cupboard- I also dipped the orange peels in chocolate...
Step 1: I thoroughly washed the oranges. I put the orange peels in a large pot and let them sit for 3-4 days changing the water a few times a day. (If you do not want to wait that long you can let them sit for 2 days and bring the water to boil 2-3 times before candying them)
Step 2: Cut the orange peel into strips
 |
| Step 3: make a syrup consisting of water and sugar. (For about the peels of 2kgs of oranges I used 0.5 liter of water and 0.5 kg of sugar) When the sugar has dissolved, add the peels. |
 | |
| Step 4: Let the orange peels cook, this can take over an hour. stirring occasionally so the sugar does not burn. |
 | ||||||
| This is what it should look like when the water is gone, at the last stage it is best to stay near the pot and stir. |
Step 6: Melt dark chocolate in a shallow pot over boiling water
.
 | ||
| Step 7: Dip peels in chocolate and place on baking sheets- it important to use a non-stick surface so it is easily removed after chocholate dries. I left peels on tray overnight |
 | |||||||
| Here is the end result... they taste a lot like like Terry's Chocolate Oranges! |
DINOSAUR SOFTY in Dinosaur Egg
On the way home from buying my first bigger batch of felt material, I asked my son what he would like to make from it. His answer: "A Dinosaur!....a dinosaur who can climb out of an egg!" And this is what we came up with:
I made the egg, but the dinosaur was a joint project: I cut out the shape he wanted (T-rex) from felt. He did the stitching along the side of the dino and I added the teeth, eyes and sewed on the wave ribbon. This sort of stitching is quite easy for kids to manage, and he was so proud of his work! As was I!
The wave could also have been sewn in between the two layers of felt, but that would have been very difficult for my little man.
Sunday, March 4, 2012
 |
As a mom, decorating birthday wrapping paper has the added benefit of being a fun to do with kids! Moreover children like to feel that they were involved in making the gift.
This time we made robot wrapping paper:
 | |
| Here is the end result, I really like the retro feel of the robots. The paper got a bit crumbled after my two kids handling it,...but that just makes it more precious, right? :) |
Saturday, March 3, 2012
MONSTER TOOTH FAIRY PILLOW #2
 I made this monster as a birthday gift for one of my son's school friends...as they are both 6 I suspect this is one of many that I will make for upcoming birthday parties. I sewed a single layer of yellow felt triangles to make the horns/ears between the front and back side and stitched the sides of the horns with green felt just for decoration. Because sewing 4 layers of felt is quite difficult- when making the eyes- I first sewed the black layer on the light green, then the light green onto the white and finally the white of the eye onto the dark green body.
Subscribe to:
Comments (Atom)


