Showing posts with label decor. Show all posts

Wednesday, June 6, 2012

Napkin holder


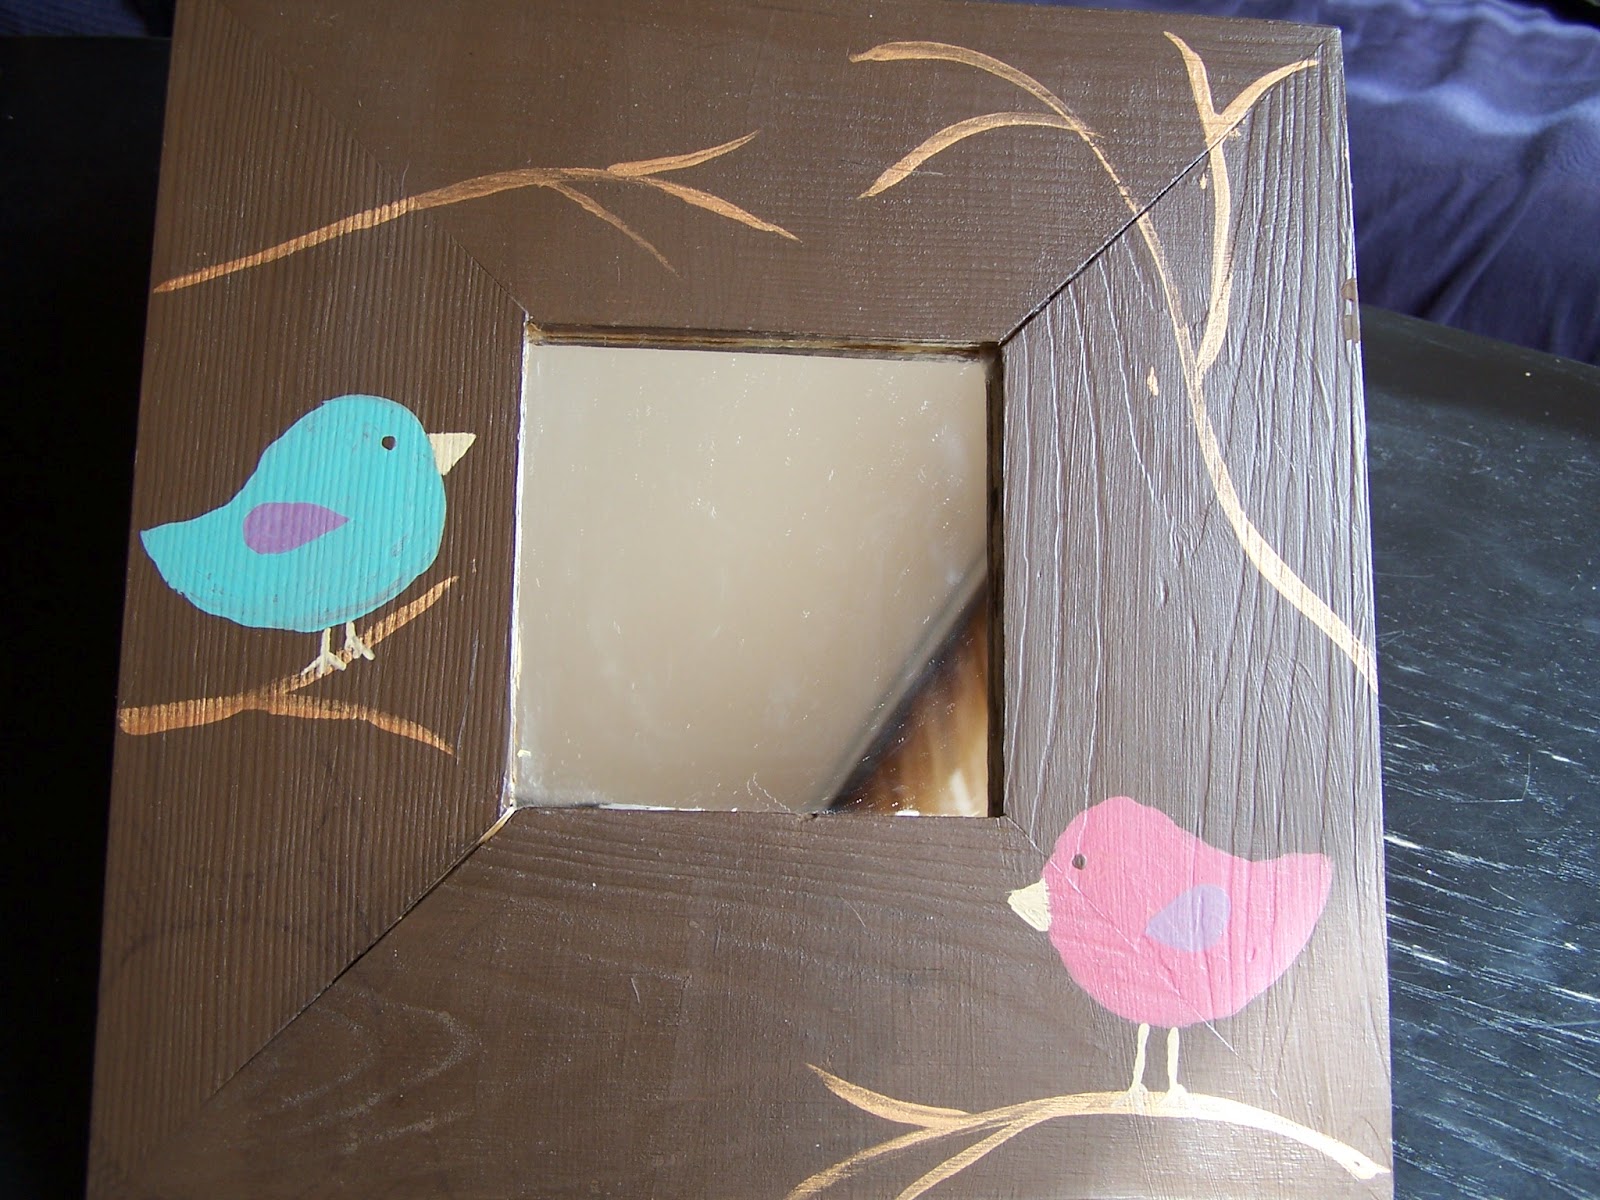
I have been meaning to buy a napkin holder for years. I could not find one that was right so I kept putting it off. This one was originally meant for my cousin to match the bird mirror frame (: http://thefeverishfeltist.blogspot.hu/2012/05/put-bird-on-it-be-birded-mirror-and.html). So I painted it brown, but I accidentally got sunblock and possibly nappy cream smudges on both sides of the napkin holder and there was no way I could cover it with more coats of paint. I had to cover the oily stains with paper. So I decided to make stocky animals wearing scrapbook paper...
I bought this base at the crafts shop

I drew and cut out the animal shapes which I traced onto the wooden base and also traced onto the scrapbook paper.


I used acrylic paint and a matt finish. I have a red and white polka-dotted table cloth and I added the dotted dishes on both sides so at least the napkin holder matches something :)

More letters!

I made some more letters for my friends'  kids. I kept the baking paper cutouts from the first batch and it was much easier to make these! See previous project here: http://thefeverishfeltist.blogspot.hu/search/label/alphabet

I gave the bear a ribbon for a more girly effect!

Eskimo child with penguin painting

I painted this picture of an eskimo child and penguin on a piece of ply-wood I bought at the crafts store. I used acrylic paints and a matt finish. I found similar illustrations in a djeco catalogue, so the design is not mine...

Saturday, May 26, 2012

"Put a bird on it" be-birded mirror and wooden flower pot

 Ikea Malma mirrors are ideal for crafts projects, especially painting. They are inexpensive, have a relatively large surface and have a useful function. This is my first completed mirror but I suspect there will be more to come!
 Clearly inspired by Portlandia's "Put a bird on in" sketch (http://www.youtube.com/watch?v=iHmLljk2t8M) I did just that a couple of months ago, when deciding on the decor for this IKEA Malma mirror that I made for my cousin's birthday. I made a template for the birds' bodies (by cutting the shape from paper) to make them even. I used acrylic paints. The actual colors in the bottles of the pink and green were super bright, so I added a bit of tan paint as well as some of the bronze paint  and mixing them. These new colors matched very nicely and were much prettier. This is not rocket science, but I'd not understood mixing colors until I did this project... I also used an finish as the brown paint rubbed off on the wall.


As I had quite a bit of mixed paint left over I searched our home for other wooden surfaces in need of a bird... in the end I found this wood flower pot that we use to keep nick-knacks in.


Wednesday, April 18, 2012

Letters


My younger son is nearly 15 months old and still doesn't have his name on the door he shares with his brother...that is he didn't have his name until two days ago. The change was triggered by my broken angle and lots of free time to browse the internet without any  feeling of  guilt whatsoever.
I was googled the name of a really great illustrator Geraldine Cosneau and found her blog (http://geraldine-cosneau.blogspot.com/) she posted about a foam animal alphabet kit she designed. It was so adorable that I asked my sister to buy me a pack (actually two cause my friend wants one too) the next time she is in Paris. But since I couldn't wait, I decided to make larger letters for the boys' door.

I used a cereal box, acrylic paint and an matt acrylic finish as well as decor paper (or scrapbook paper). Due to the paint and finish the letters are hard, but the cardboard is rather thin, which helps precision. To make sure they stay flat, I put them under a heavy book right after the paint (and later the finish) dried, covering the painted side with a plastic sleeve.

My older son liked the letters so much he asked me to make the letters for his name as well, with lots of dogs!  Because hos name starts with "Á" I added a frankfurter above the first doggy's head.

 They turned out nice but not as wonderful as Geraldine Cousneaus. Her kit can be ordered from amazon.fr:

http://www.amazon.fr/Ma-Boite-Gommettes-Lettres-Animaux/dp/2244066231

FELT HAIR CLIP HOLDER

 I made this hair clip holder out of felt, reused (or upcycled) fabric and ribbons. It will be a gift for our niece's 8th birthday. I had seen some really cute clip holders a couple of months ago and had been planning on making one, but was uncertain about the design.  I saw some strawberry ribbon at the store and fell in love and decided use it for this project. My sister-in-law mentioned that my niece likes fairies and as I was combing through my stash I found the pink dotted fabric (formerly a t-shirt) that I used for the first batch of Easter eggs and thought it would go well with the dots on the strawberries.

Monday, April 2, 2012

EASTER EGG GARLAND TUTORIAL

As I feel that I need an excuse to post another Easter Egg garland that is basically the same as the last, I've decided to make it into a tutorial :) Otherwise, the special thing about this garland is that my very creative mother-in-law asked me to make it for her!

So here it goes:

I made an egg pattern from cardboard and cut out 14 eggs from green and pink felt (8:6). I also cut some  felt into strips as shown above ( if you know how to name it please let me know!) and strips of cotton fabric. I find cutting everything out makes working on the garland faster and neater.

I sewed all the embellishments on 7 of the eggs. I cut the ends of the felt strips after they are sewn on.


I sewed the two sides of each egg together leaving a gap through which I could add the stuffing.


Here again, I sewed all the all the eggs before I stated stuffing them. 


I added the cotton wool.

Here are some of the eggs. Left as they are they could make cute Easter decorations if put in a basket.
After figuring out how I want to position the eggs on the satin ribbon (centers 20cms apart) I pinned the eggs onto the ribbon one at a time
I sewed then on one at a time


Not my most beautiful work, but no one will see the back, right?

Here is the end result. I really need a better place to showcase garlands :).Hopefully I will get a photo of the garland in my in-laws' kitchen!

Wednesday, March 21, 2012

EASTER EGG GARLAND

EASTER EGG GARLAND

I made this garland as a gift for a friend out of felt and re-purposed textile. I sewed the ribbon to the back of the eggs close to the top so they would not twirl around. This worked out better than the bird garland where I sewed the ribbon in between the layers of felt.
For the central egg I cut out one of the baskets that was on the print.


 The textile I used was strips made of some scraps let over from an old dress my friend P and I picked up at a jumble sale. She used the fabric from the dress so sew a really cool dress for her daughter. When she starts her blog I will include a link to the dress (hint hint :))

Monday, March 5, 2012

PAPER-AIRPLANE MOBILE

One of my sons latest and most enduring obsessions is folding paper airplanes. He loves folding and throwing them about. So for his birthday his grandma bought him an adorable Origami Airplane kit by Djeco (www.djeco.com)
I liked the design of the planes so much, I wanted to use them for decor, so I came up with the idea of making a mobile for the kids' room.  So I took some thin ribbon, tape and two wooden sticks and got to work. It is all pretty straight forward, the only tricky bit was finding the spot to attack the ribbon to so the planes would be in balance. 

I had a lot of fun photographing the mobile :) Enjoy!


Wednesday, February 22, 2012

FELT BIRD GARLAND

I made this garland as a Christmas present for a friend's daughters. It would work well with brighter colors for spring... I will make one soon :)

 The possibilities of using these garlands for home decor are endless :).... but not always practical...
The birds and heart are sewn onto a satin ribbon. I placed the ribbon in between the two sides of each bird. First I sewed the ribbon onto all the back pieces with transparent thread and then I sewed on the front pieces with blanket stitches.
I added the beak (a single layer of felt) as I was stitching the two sides together.
Felirat hozzáadása


Tuesday, February 21, 2012

 SPRING BIRD 
As Spring is approaching - I hope- I thought I'd get it the mood by making this bright bird, much like the Xmas version but with an orange polka-dotted loopy tail feathers!


Here you can see the bird contemplating the weather or alternatively engaging in voyeurism...

We eventually hung it on our front door to bring hope and joy to the neighbors... or at least distract attention away from all the junk that we keep piled up in the hallway...